Easy Homemade Orange Chicken Recipe with Nutritional Benefits

Ingredients for Homemade Orange Chicken
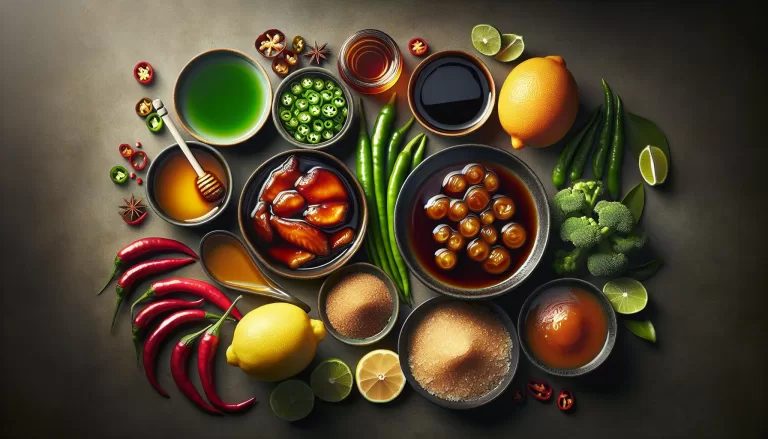
Moving on to the heart of the recipe, it’s critical to know what ingredients you’ll need. Ensuring that you have the right ingredients can profoundly impact the overall taste and flavor of your homemade orange chicken.
For the chicken:
- 2 lbs chicken breast (cut into 1-inch pieces)
- 1 ˝ cups flour (for coating)
- 2 eggs (beaten)
- Salt and pepper to taste
For the sauce:
- 1 cup orange juice
- 3 tablespoons honey
- 2 tablespoons soy sauce
- 2 tablespoons vinegar
- 1 tablespoon grated orange zest
- 1 tablespoon ginger (minced)
- 3 cloves of garlic (minced)
- 2 tablespoons cornstarch (mixed with 1/4 cup water)
The process requires the use of common kitchen staples, so you should not have any trouble finding these ingredients in your local grocery store.
Do you want to give your dish a unique twist? Try replacing the honey with maple syrup. This alternative imparts a unique, tantalizing flavor to the dish.
Digging a bit deeper into nutrition, let’s look at some nutritional facts. A serving of this homemade orange chicken dish contains:
| Nutrient | Amount |
|---|---|
| Calories | 360 |
| Carbs | 30g |
| Protein | 26g |
| Fat | 12g |
It’s essential to keep this nutritional information in mind, especially if you’re watching your intake of calories or carbs.
Step 1: Preparing the Chicken

Kickstart your culinary adventure by washing your hands. Hygiene first isn’t just a phrase; it’s a necessity. Grab the chicken; slices of boneless, skinless chicken breast would be your best bet.
Approximately one pound should be fine for a family of four. Take a good look at the chicken first though, make sure there aren’t any leftover bones or unwanted fat.
Next, grab a kitchen knife, ensure it’s clean. Chop the chicken into bite-sized pieces. Keep your pieces uniform in size, about one inch. This won’t just ensure an appealing final product, but it’ll also promote even cooking.
Reach for your trusty marinating bowl, toss your chicken pieces in. Don’t forget, every hasty cook is a bad one. Take your time; let the chicken take a deep breath before you add any marinade.
Ready to expertise up your homemade orange chicken? Try this tweak – A pinch of salt and a crack of black pepper while marinating the chicken. It’s an uncommon trick, but it adds another level of flavor to the dish.
Here’s the part where you add the originality to your recipe. Get your hands on ripe oranges, you’ll need about two. Extract the juice; consider it as your secret ingredient. Combine it with half a cup of maple syrup – a definite game-changer. Mix it well, keep stirring until your marinade is beautifully blended.
Armor the chicken with your homemade marinade, then wrap and leave it in the fridge. Let the marinade work its magic through the chicken for at least 30 minutes. If patience is your middle name and you’ve some extra time, let it sit there overnight – the flavors intensify and penetrate better.
While waiting, clean up your workspace, prepare yourself for the next stage. The journey to a delightful homemade orange chicken isn’t over; it’s just the beginning.
Step 2: Making the Orange Sauce

Let’s shift gears and focus on the powerhouse of this dish, the orange sauce. When done right, it’ll provide the zesty punch that marries perfectly with the succulent chicken.
Grab a saucepan and place it over medium heat. You’ll need to mix in 1 cup of fresh orange juice, 2 tablespoons of soy sauce, and 1 tablespoon of white vinegar. Make sure to stir well as you combine these ingredients. Fresh orange juice trumps packaged options any day, delivering tanginess and freshness that’ll give your dish an authentic quality – a true homemade touch.
You then need to introduce the sweeteners – 3 tablespoons of granulated sugar and 1 dash of maple syrup. These two work in tandem to balance the citrus acidity, rounding out the overall flavor profile. Maple syrup isn’t your everyday variety in regional orange chicken renditions, but it imparts a subtle woodiness that’ll keep your taste buds guessing.
Once your mixture is stirred and heated, a thickening agent is crucial. Slowly add in a cornstarch slurry – 1 tablespoon of cornstarch mixed with 2 tablespoons of water. Stir consistently to prevent lumps, and watch as your sauce transforms to a silky, thick texture. Always remember, the key to a great sauce is balance – citrus, sweet and a hint of salt.
Let the magic happen and allow your sauce to simmer for about 10 minutes. You’re aiming for a sticky, glossy finish that’ll coat your chicken well.
As for the nutritional value, here’s a little rundown.
| Ingredient | Calories | Carbs | Protein | Fat |
|---|---|---|---|---|
| Orange Juice | 112 | 26g | 2g | 0g |
| Soy Sauce | 10 | 1g | 2g | 0g |
| White Vinegar | 3 | 0g | 0g | 0g |
| Sugar | 144 | 37g | 0g | 0g |
| Maple Syrup | 52 | 14g | 0g | 0g |
Step 3: Coating and Cooking the Chicken

After you’ve marinated the chicken and prepared the tangy orange sauce, it’s time to move onto the next step: the coating and cooking of the chicken. This process ensures your chicken turns out crispy on the outside and juicy on the inside, all while enveloped with our delicious homemade sauce.
First, in a separate bowl, whisk together 1 cup all-purpose flour, 1/2 cup cornstarch, and 1 teaspoon baking powder. This mixture will be your dried chicken coating, providing that much-needed crunch on every bite. As an alternative, you could also use breadcrumbs or crushed cornflakes for a fun variation.
Taking pieces from your marinated chicken, dredge each piece in the aforementioned dry mixture. Ensure every piece is fully coated. This could get messy, but it’s all part of the culinary fun!
Next, let’s heat things up. You’ll need a deep skillet or a heavy-bottomed pan for frying.** Pour enough cooking oil to cover the base of your pan, approximately 1-2 inches. Heat the oil to 350°F**. Hothead tip: If you don’t have a kitchen thermometer on hand, stick a wooden spoon into the oil. If you see bubbles forming around the spoon, your oil’s hot enough.
Once the oil’s heated, gently drop the coated chicken pieces in. Do not crowd the pan, as it may lower the oil temperature and result in less crispy chicken. Cook the chicken until it’s golden brown and fully cooked inside – roughly 2-3 minutes per side. Always ensure your chicken’s thoroughly cooked to maintain your meal’s safety.
Return your attention to the orange sauce once more. **Heat it over low flame until it reaches a simmer. Toss the crispy chicken pieces directly into the sauce, stirring until each piece is generously coated.
| Ingredient | Quantity |
|---|---|
| All-purpose flour | 1 cup |
| Cornstarch | 1/2 cup |
| Baking powder | 1 teaspoon |
| Cooking oil | Enough to cover the base |
Serving and Enjoying Your Homemade Orange Chicken

Now that the cooking part is over, it’s time to talk about serving your homemade orange chicken. Presentation is key when it comes to any dish, and it’s no different here. Especially when it smells as delicious and looks as appealing as this!
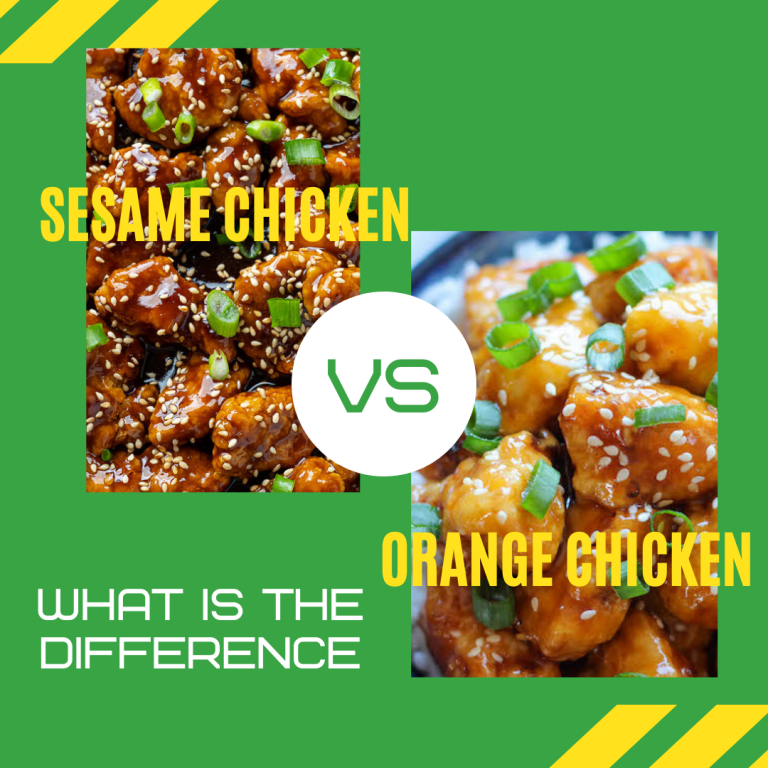
First things first, lay your chicken out on a large platter. Go for one which complements the vibrant orange color of the sauce. This is your moment to let your culinary skills shine. Sprinkling some sesame seeds and chopped spring onions over the top will add an excellent touch. For a pop of color, some leafy green lettuce on the side won’t disappoint.
When it comes to enjoying your dish, it’s best served hot. You want that crispy chicken to maintain its texture. Pair it with some steamed rice or noodles for a complete meal. And don’t forget a pair of chopsticks to dig in! It might be fun to include a little culture in your dining experience.
Have dietary restrictions or nutritional goals to consider? Here’s some good news for you. Homemade orange chicken is a balanced dish. It provides a solid mix of protein, carbohydrates, and vitamins.
| Nutrient | Approximate Amount |
|---|---|
| Protein | 35 grams |
| Carbohydrates | 45 grams |
| Vitamins | 20% of daily value |
These figures may vary a bit depending on your personal cooking style and the specific ingredients you use. Be sure to opt for lean chicken and control the amount of oil to make it a healthier version.
Importantly, remember to savor each bite of your homemade orange chicken. You’ve put time and effort into it. The tangy orange sauce, the crispiness of the chicken, and the joy of having created something so delicious, that’s what makes it all worthwhile. Possibly start thinking about your next culinary adventure…
Conclusion
So there you have it – your guide to a fantastic homemade orange chicken recipe. You’ve learned not just how to cook it, but also how to serve it up with style, using garnishes like sesame seeds and spring onions. You’ve discovered the perfect pairings of steamed rice or noodles, and you’ve gained insight into the balanced nutritional content of this delicious dish. Now it’s time to savor each bite, relishing the fruits of your labor. But remember, this is just the beginning. Your culinary journey has many more exciting stops ahead. So keep your apron on, your kitchen tools ready, and your appetite alive. Happy cooking!
