Easy Homemade Yangbaechu Kimchi Recipe for Digestive Health and Budget Cooking
History of Yangbaechu Kimchi
In your journey of mastering the delicious yangbaechu kimchi, it’s essential to delve into its rich history. After all, it isn’t just a tasty side dish; it’s a culinary heritage with a tale worth telling.
Kimchi’s roots trace back to the Three Kingdoms Era (37 BC – 7 AD) in Korea. But the yangbaechu, or green cabbage variety, actually came into the picture later on. When red peppers arrived in Korea in the 17th century, they revolutionized how kimchi tasted and looked. Eventually leading to the spicy and vibrant yangbaechu kimchi you know today.
Yangbaechu kimchi’s core ingredients grew during cold winters in Korea. This ensured food supply even in harsh weather, emphasizing the dish’s role not just in Korean gastronomy, but in survival. Preservation and fermentation, are what made it possible for locals to have veggies all year round.
The unique concoction of salt, garlic, fish sauce, and red pepper flakes became a magical potion that turned plain cabbages into flavorful, gut-friendly treats. And that’s what you’re aiming for when you decide to make your own yangbaechu kimchi – a piece of tradition right in your own kitchen.
This dish’s evolution is a reflection of Korea’s history, flavored by influences from different cultures, climate changes, and a testament to Koreans’ resilience and resourcefulness. It’s more than a simple side dish; it’s a symbol of Korean gusto and spirit. As you prepare your kimchi, you’re not just making food – you’re partaking in a time-honored tradition.
Take note of this history as you prepare your ingredients. Remember, each step, each ingredient is a tribute to the centuries-old wisdom of preserving food, beauty of fermentation and above all, the love for good, homely flavors. But don’t worry, making yangbaechu kimchi isn’t as complicated as its history might imply. In fact, it’s downright easy and fun! So, roll up those sleeves and get ready to immerse yourself in the art of making yangbaechu kimchi.
Ingredients Needed
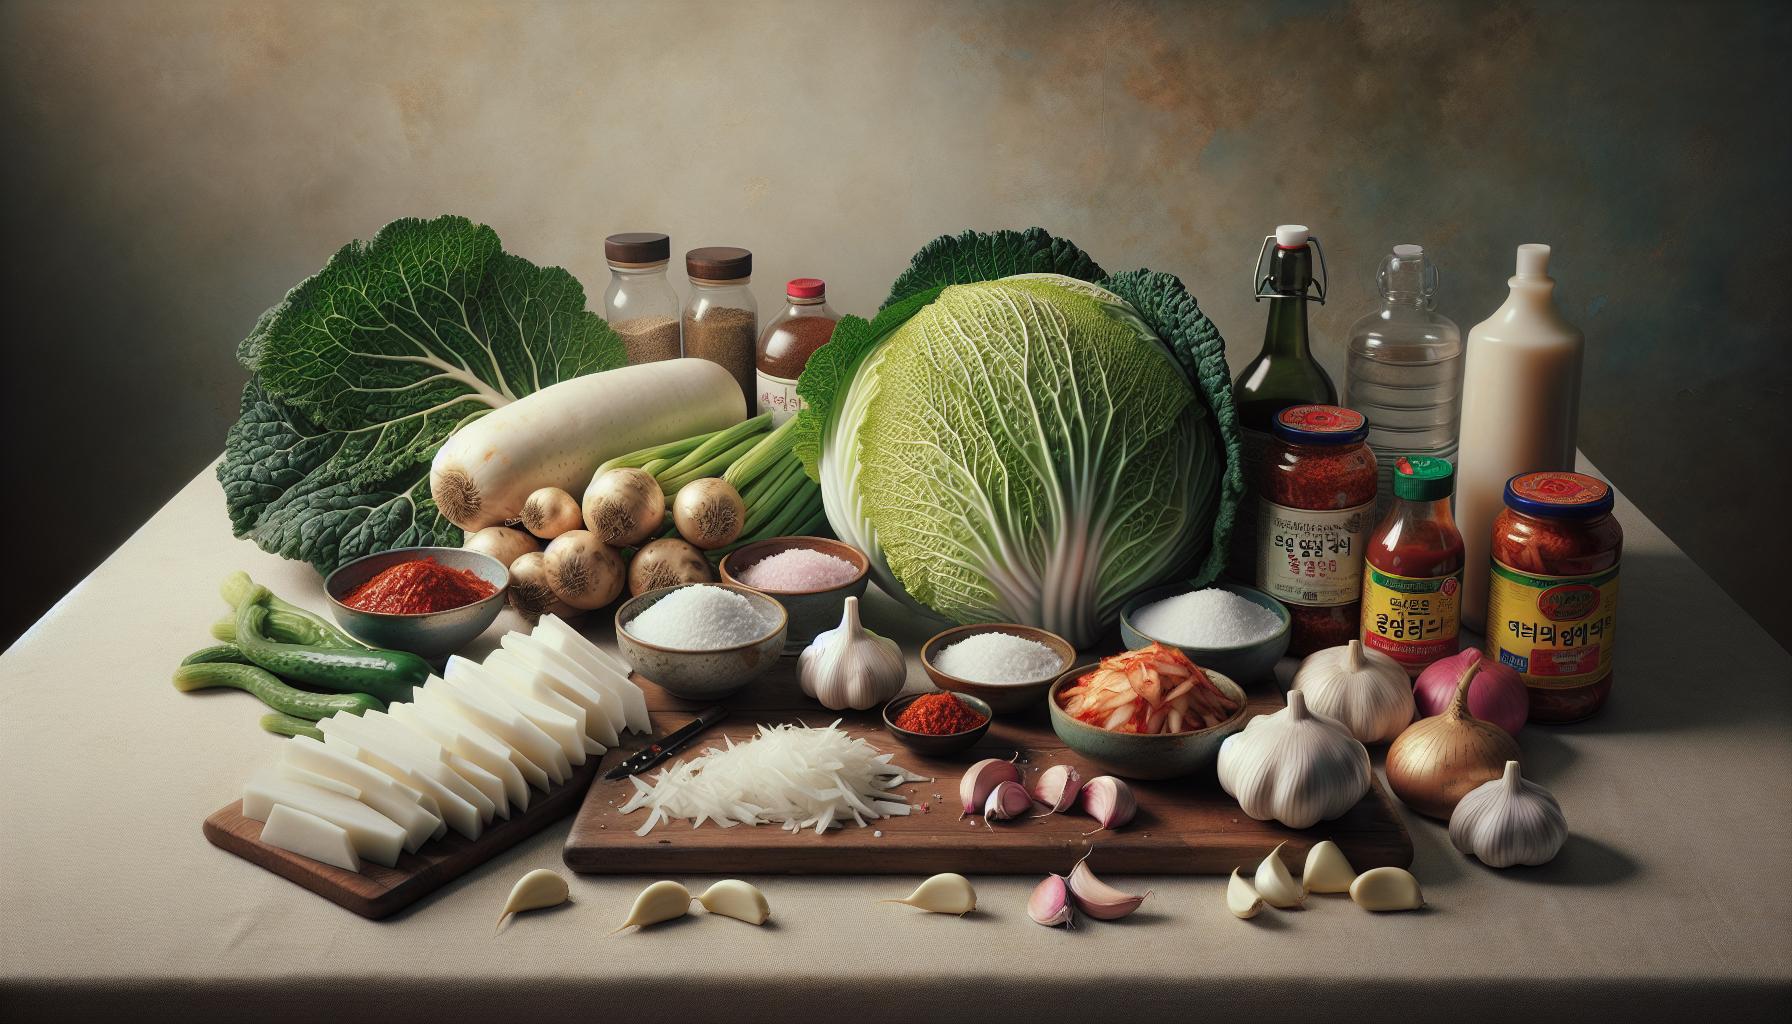
Ready to dive into the art of making your own yangbaechu kimchi? Let’s gather up those ingredients. You’ll need:
- 1-2 heads of Napa cabbage. It’s a leafy, oblong variety known for its crinkly leaves and sweet taste.
- Sea salt. It’s crucial for the initial pickling process to soften the cabbage. You’ll need about 1/2 cup.
- Daikon radish. A key ingredient in traditional kimchi recipes, it gives an extra crunchiness. You’ll need approximately 1 cup, diced.
- Garlic and ginger. These power-packed flavors bolster the kimchi’s taste. You’ll need four cloves and a two-inch piece respectively.
- Gochugaru (Korean red pepper flakes). This gives your kimchi its spicy hit. For moderate heat, you’ll need about 1/2 cup. Feel free to adjust according to your spice tolerance.
- Fish sauce or shrimp paste. Half a cup should contribute to that savory base flavor.
To make it extra unique, consider incorporating Asian pears. Add in half a pear, pureed, for a subtle sweetness that complements the heat beautifully.
You’re probably wondering about the nutritional facts per serving. This table displays the calories, carbs, protein and fat content of yangbaechu kimchi:
| Nutrient | Amount per serving |
|---|---|
| Calories | 15 |
| Carbs | 2g |
| Protein | 1g |
| Fat | 0g |
It’s noteworthy that yangbaechu kimchi is rich in Vitamin A, Vitamin C, and probiotics. These micronutrients promote skin health, immune function, and gut health respectively.
Well, you’ve got all you need. Let’s move on to the next step, analyzing each ingredient’s role in the final product. Rest assured, your yangbaechu adventure has just begun.
Step-by-Step Instructions

Let’s dive right into the art of making homemade yangbaechu kimchi. You’ll be genuinely surprised how simple it can be!
First off, you’ll need to prepare your cabbage. Cut your napa cabbage in half lengthwise. Once done, place both halves in a large bowl, sprinkle with sea salt, and mix until well-coated. This part is critical — the salt naturally wilts the cabbage, enhancing its flavor. Now, rest your cabbage for about 90 minutes.
The next phase involves preparing the kimchi paste. Chop the daikon radish into thin slices and put it aside. Combine the garlic, ginger, and Korean pepper flakes in a food processor. Blend to create a fiery paste that’ll give your kimchi its unique kick.
For a unique twist to your kimchi, consider adding grated Asian pears to the mix. Not only does this add a natural sweetness to the dish, but it also cuts through the heat of the red pepper flakes – a little secret to make your homemade kimchi memorable.
It’s time to combine and ferment. But before that, don’t forget to add fish sauce or shrimp paste to your blend — this adds a depth of flavor that’s unbeatable.
Mix all your ingredients, ensuring every slice of cabbage is well-coated with the kimchi paste. Pack tightly in a clean, air-tight jar, and let nature run its course. You’ll want to situate your jar at room temperature for at least 48 hours.
And here’s what might be the most surprising part: kimchi’s nutritional profile. Who would think you’d get a nutrient-packed side dish that’s low in calories? Here’s the lowdown on its nutrition per serving:
| Nutritional Value | Per serving |
|---|---|
| Calories | Low |
| Carbs | High |
| Protein | Moderate |
| Fat | Low |
| Vitamins | High |
Tips and Tricks for Homemade Kimchi

You’ve nailed the basics of making homemade yangbaechu kimchi. Now, it’s time to up your game with a few tips and tricks.
High-Quality Ingredients Matter: Splurge on the best ingredients you can afford. Go for Korean pepper flakes from an Asian grocery – their unique flavor can’t be replicated by substitutes. Fresh ginger, garlic, and daikon radish are non-negotiables too.
Salt Is Key: Choose a high-quality sea salt for wilting the cabbage. The end result will have a robust flavor profile, making all the effort in preparation worth it.
Swap the Shrimp Paste: If you’re vegan or just not a fan, try using kelp powder or soy sauce.
Tweak to Your Palate: Like your kimchi sweeter or spicier? Fine-tune the recipe. Add in Asian pears for a sweeter edge – you might love the result.
Experiment with Fermentation: Some like their kimchi freshly made, others prefer it fermented. Don’t be afraid to experiment. Find your perfect fermentation period – one day, two days, or more.
Temperature Matters: Kimchi ferments best at around 18-20°C (64-68°F). So, keep tabs on your kitchen temperature for optimal fermentation results.
| Fermentation Temperature | Duration |
|---|---|
| 18-20°C (64-68°F) | 1 – 2 days (or longer) |
As you embark on this exciting culinary adventure, remember: making kimchi is part science, part art. Each batch you create might be slightly different. Enjoy the process. Everyone’s kimchi journey is unique.
Benefits of Making Your Own Yangbaechu Kimchi

Mastery of the homemade yangbaechu kimchi recipe gifts you with benefits that extend beyond culinary vibes. It offers health benefits, satisfies your creative urges, and serves as an economic choice.
You steer your voyage towards health with each stir of yangbaechu kimchi mix. The prime ingredients are powerhouses of nutrition. Fresh ginger packs potent antioxidants; garlic fights against common sickness while Korean pepper flakes shine with Vitamins A and C. Daikon radishes? They light up your kimchi with Vitamins C, E and B6. Plus, the fermentation process introduces your body to beneficial bacteria which promote digestive health. The nice bonus? You’ve control over the quality of ingredients. You know exactly what’s going into your belly.
Delve into your recipe; make it yours. That’s the creative liberty yangbaechu kimchi hands you. You can experiment. A thought pops up: How about adding Asian pears for an exciting sweet twist? Acting on these whims enriches your understanding of flavors. It’s exploration. It’s personalization. You’re playing an adventurous chef in your own kitchen. Nothing’s set in stone; at each cooking encounter, you rewrite the script.
Homemade yangbaechu kimchi also eases the strain on your wallet. The ingredients could be lying around in your kitchen garden. Or you pick them up for little cost at the local market. Once made, you’ve got a supply that lasts a good while. It’s an investment. You’re dishing out a minuscule portion of your grocery budget for something that yields meals for days.
What’s more noteworthy? Every batch spins a unique tale. Guess what, you’re not just making food; you’re crafting a part of your kimchi journey. Infusing each mouthful with memories and experiences. Wow, that sounds like something to look forward to!
Curating your yangbaechu kimchi is more than a recipe – it’s the art and science of exploring flavors, investing in your health, and saving some bucks. So, ready to roll up those sleeves for your next kitchen venture?
| Benefits of Homemade Kimchi |
|---|
| Power-pack of Nutrients |
| Cost-Effective |
| Creative Exploration |
| Personalized Health Investment |
Conclusion
So you’ve seen how homemade yangbaechu kimchi is not just about the tangy, spicy flavor you love. It’s about taking charge of your health with quality ingredients and beneficial bacteria. It’s about the joy of creating a recipe that’s uniquely yours. And let’s not forget, it’s a savvy move that can save you money. With each batch, you’re not just making a meal. You’re embarking on a personal journey that blends the art of cooking with the science of nutrition. So why not roll up your sleeves and start your kimchi adventure today? After all, nothing tastes better than the kimchi you’ve made yourself.